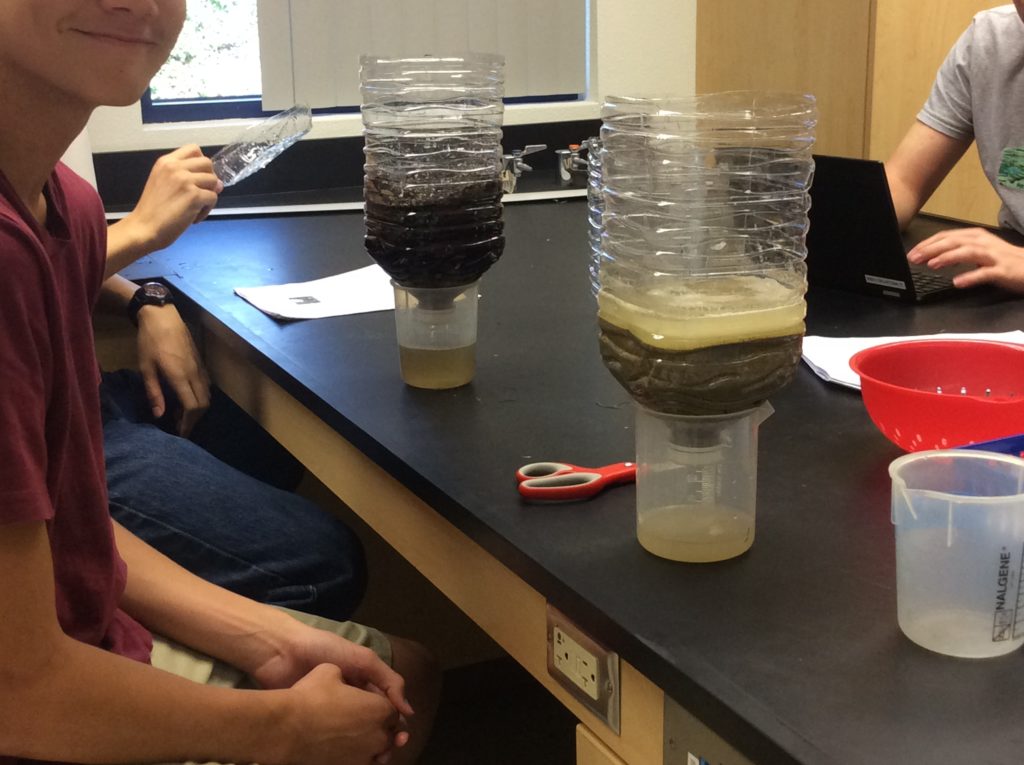
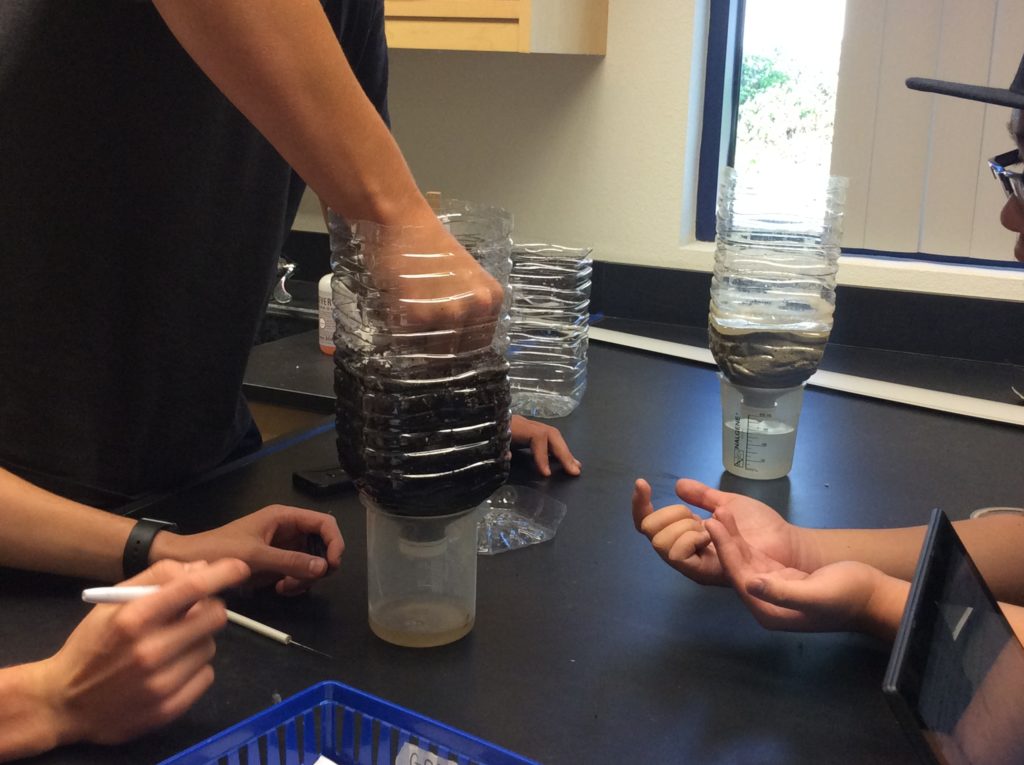
On the second day of building ecocolumns, students add seeds and begin taking data. (This can be the second hour of a block period). Before they do this, however, they need to make sure their chambers are draining properly.
Download student picture directions to build Ecocolumns.
Read about purchasing supplies and cutting and filling the bottles which are previous steps.
Planting Seeds
When the terrestrial chamber is draining properly, it is time to plant seeds. Its REALLY important to make sure they drain, drain, drain, several times as silt can clog up the drainage holes on the 5th draining or so. If the drainage gets clogged after they plant seeds in the soil, the soil and seeds get moved around (erosion) and buried too deep.
Students can choose 5 different seeds to plant. I make them choose 2 legumes out of the 5 in order to learn about nitrogen fixation.
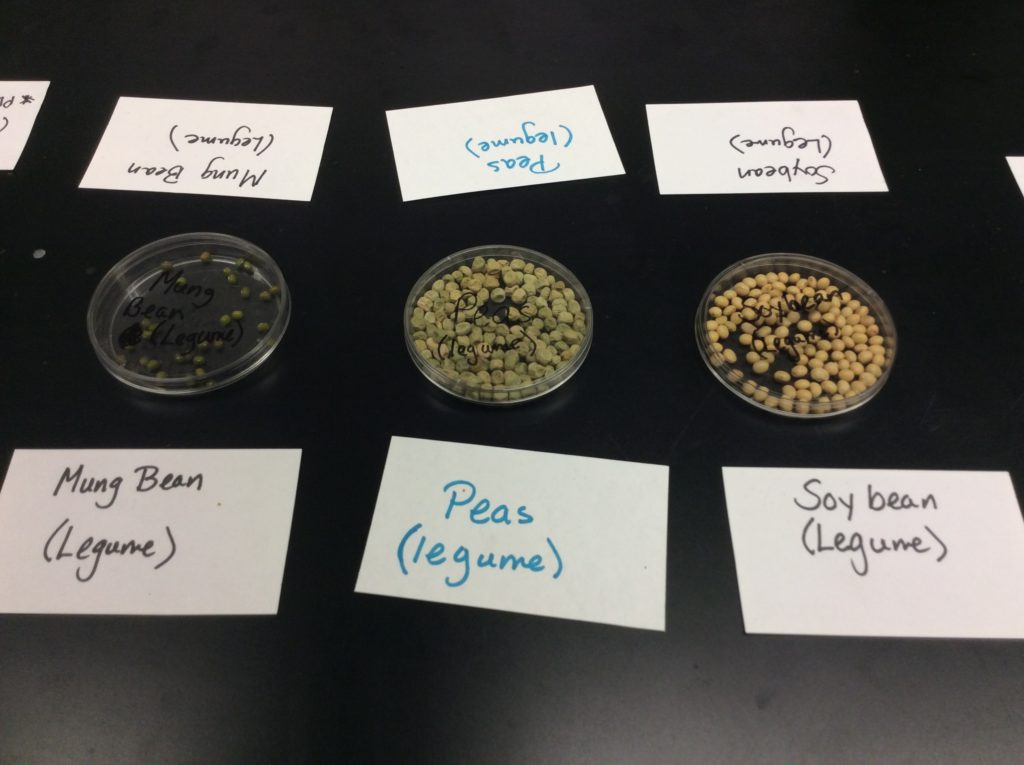

Try to buy seeds that germinate quickly. Students get very concerned when some of their seeds germinate and others take 2 weeks. They think there’s something wrong. Although that too, is a good learning experience.

I show my students about 2 minutes of this video below to show them how to write on the bottles and plant the seeds.
Setting up Data
Long-term data collection and analysis is an important way to build higher-level thinking skills. The majority of the AP® Exam consists of higher-level thinking questions and students need practice.
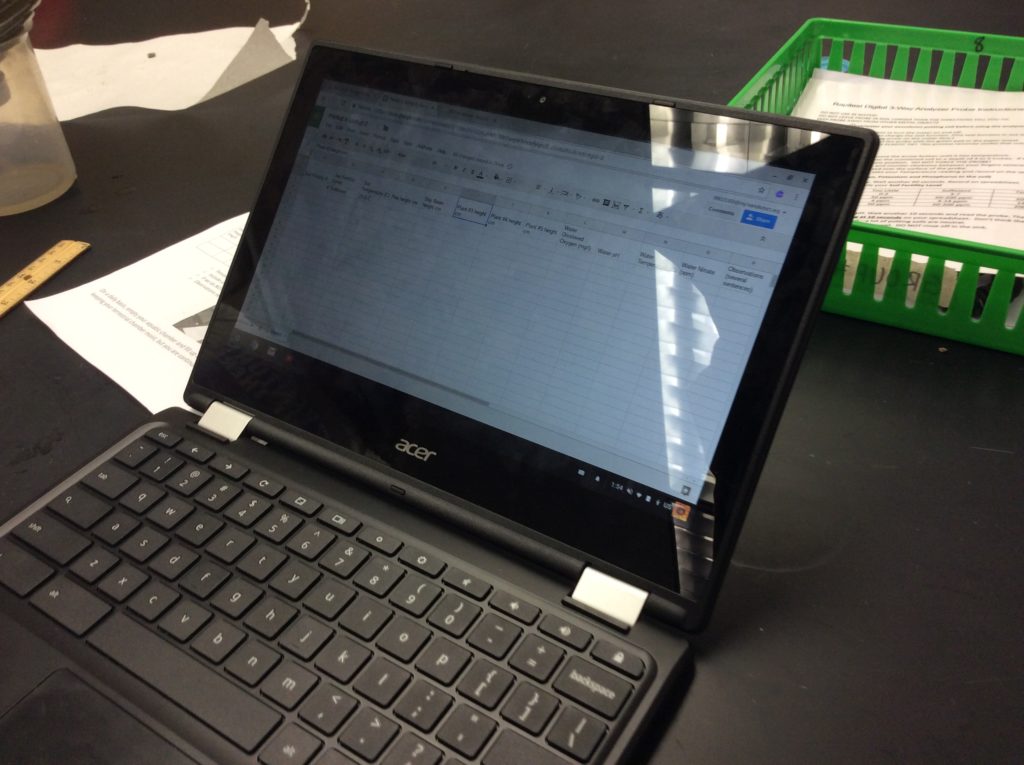
I require my groups to rotate the duty of filling in the spreadsheet as we take weekly data. This makes sure all kids get practice using spreadsheets-an essential skill in many jobs. A sample data spreadsheet can be found here.
TEACH them how to make a spreadsheet as most teens don’t know how. Scaffold, give templates, teach how to “wrap text”. Mine have always been very appreciative to learn this skill. Your template will include the specific tests that you have equipment for–probes, test strips, test kits, etc. The spreadsheet template I use is found on the student directions.
Students also need to be taught that when we don’t take data for a certain test, they should not enter “0” as this is a real quantity. They need to leave the box blank.
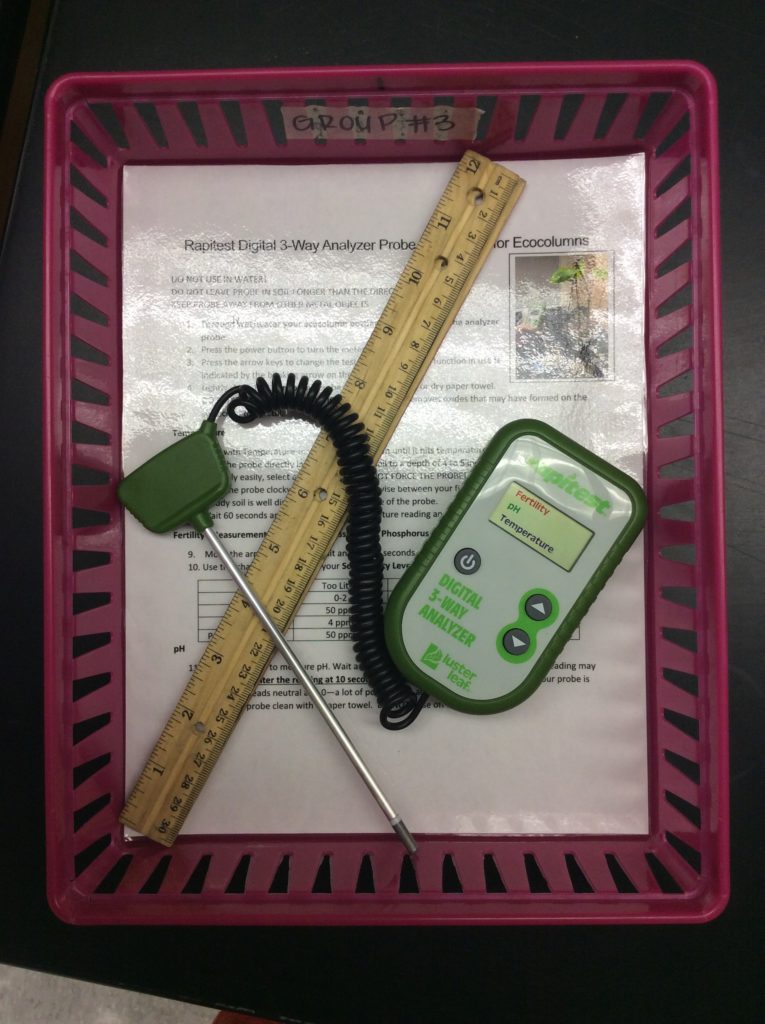
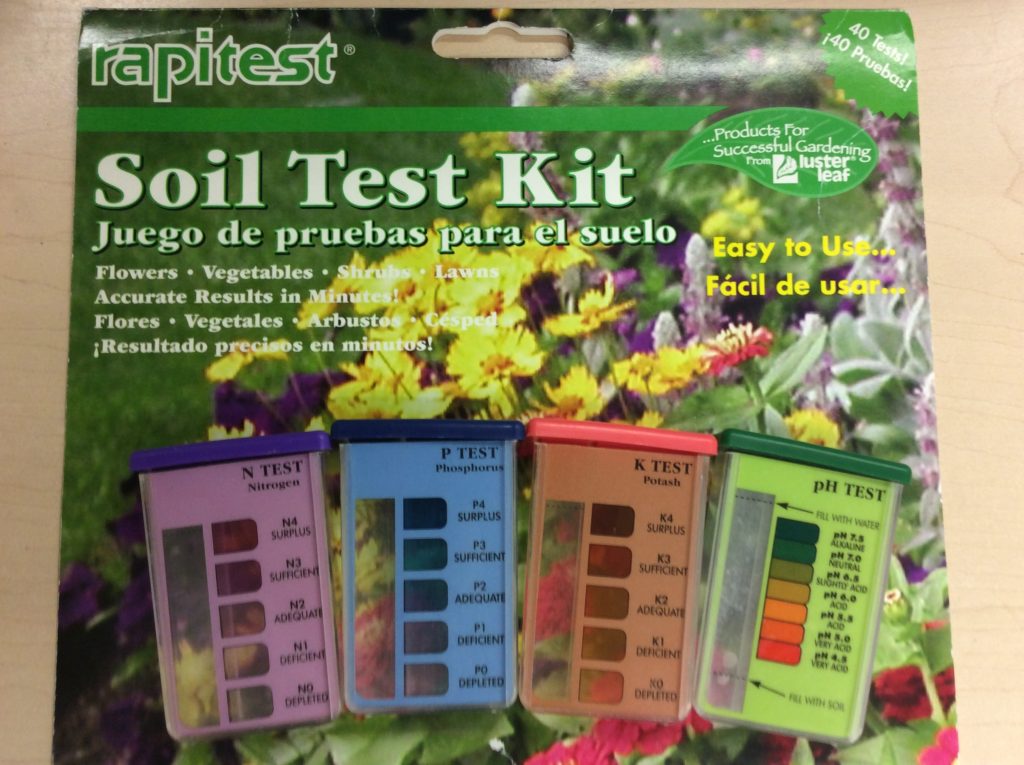
Soil Data
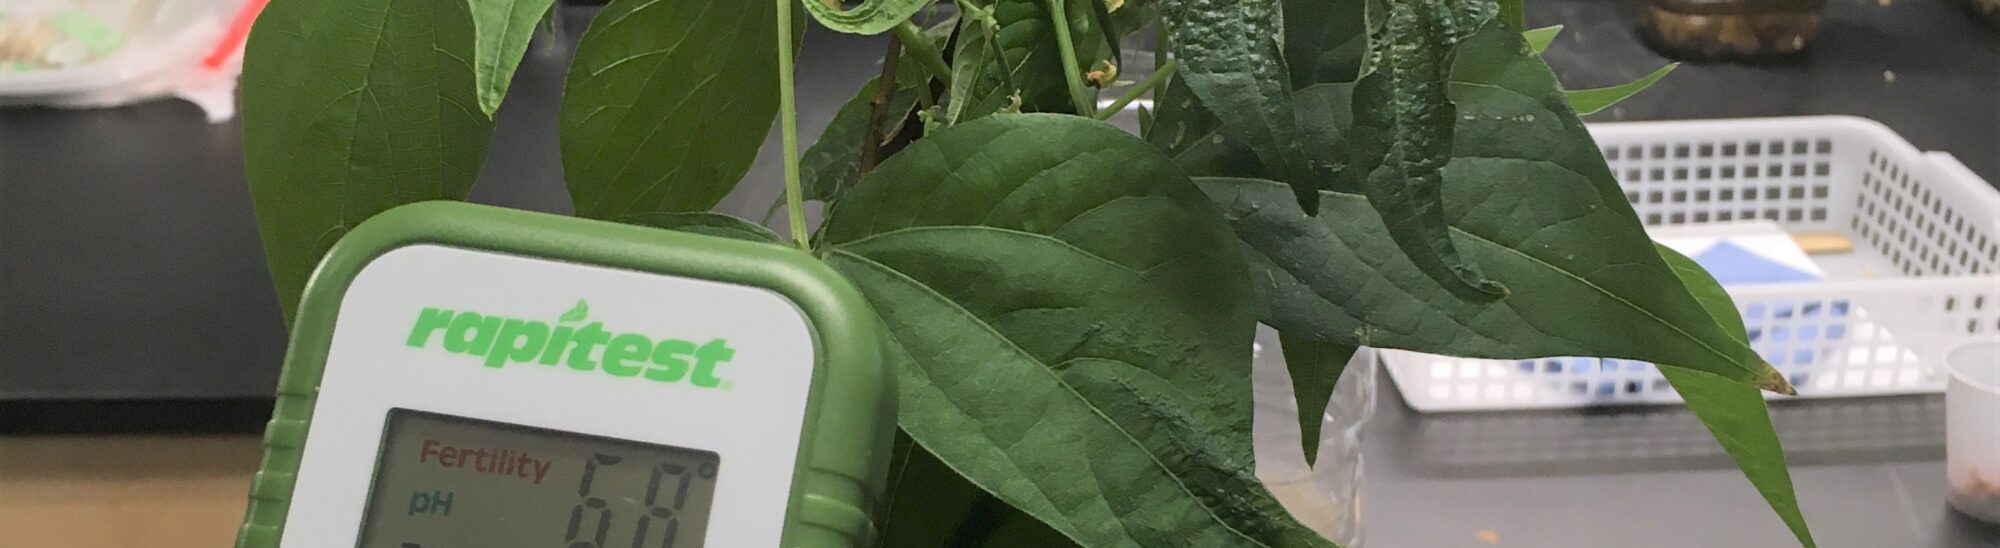
Soil data is not a necessity, but if you have some funds to buy some probes or soil test kits, it can be a good addition to ecocolumn data. Last year, I purchased several of these probes so my students now add soil temperature, pH, and combined NPK fertility. Again, don’t worry if you don’t do soil tests, I didn’t for the first 10 years of ecocolumns. Collect equipment over time. The picture below is of a soil probe which I bought 10 years after starting ecocolumns.

Since my students now take soil data weekly, by the time we cover soil several chapters later, they have some familiarity with it and I can save time by not doing a chemistry of soil lab.
After planting seeds, students should only water using the “sprinkler” they made when they were cutting bottles. This will gently water the soil without causing erosion and displacement of seeds.
Let your plants grow for about a week. DON’T MAKE YOUR AQUATIC CHAMBER AND ADD FISH YET.
9 thoughts on “Planting Seeds in EcoColumns, Taking Soil Data and Setting Up Data Charts”