After two weeks of draining your ecocolumns, its time to build the aquatic chamber. DO NOT RUSH this step.
No fish for two more days!
Student directions for building ecocolumns.
Read about buying supplies, cutting and filling bottles, planting seeds and taking data, adding detritivores and leaf litter in previous posts.
Why its Important to Wait
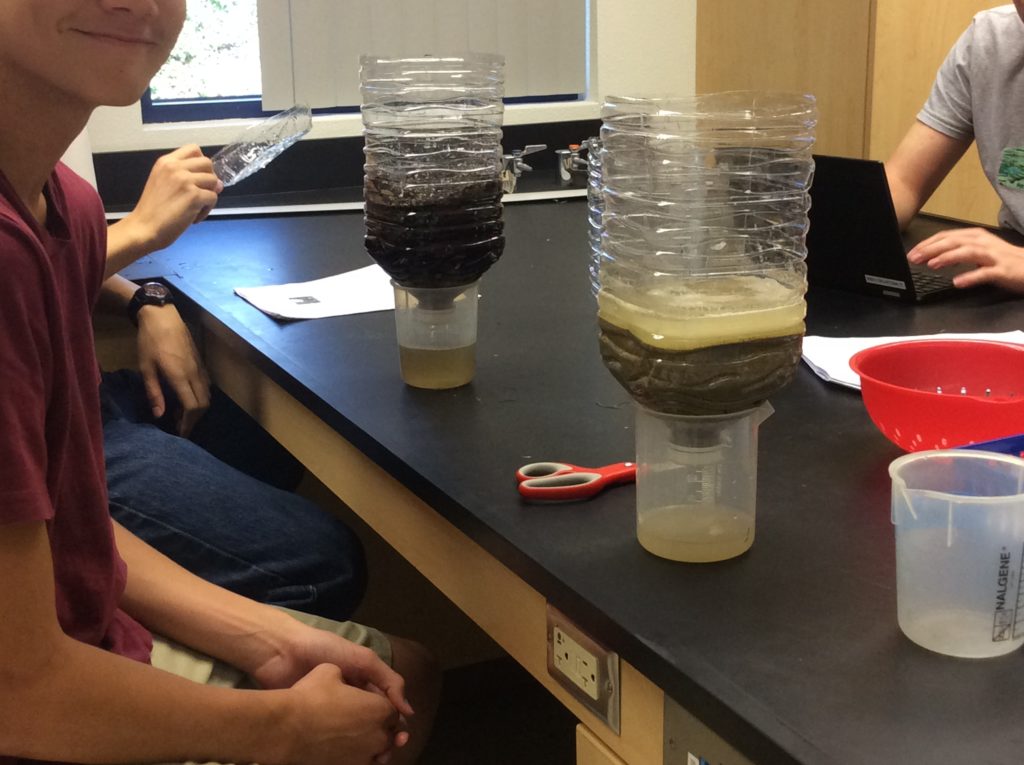
Draining the ecocolumn once every day or two is extremely important to prevent fish death. Potting soil contains silt and sand contains dust-both of which will clog fish gills. The more you drain, the cleaner the water becomes as you flush these particles out. The water may still be slightly orange/brown after two weeks, but this is mainly due to tannins in the soil rather than silt.
I usually send one student from each group into the lab to empty out the old water and fill the ecocolumn from the top to drain until the next day. This takes about 5 minutes.
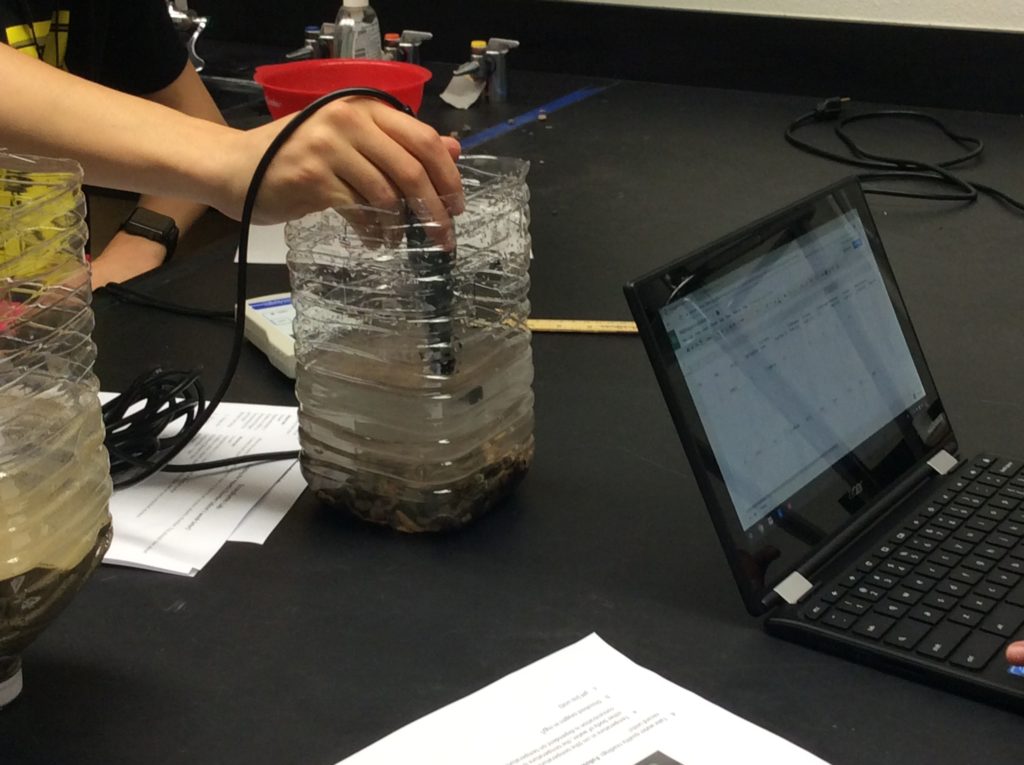
Build the Aquatic Chamber
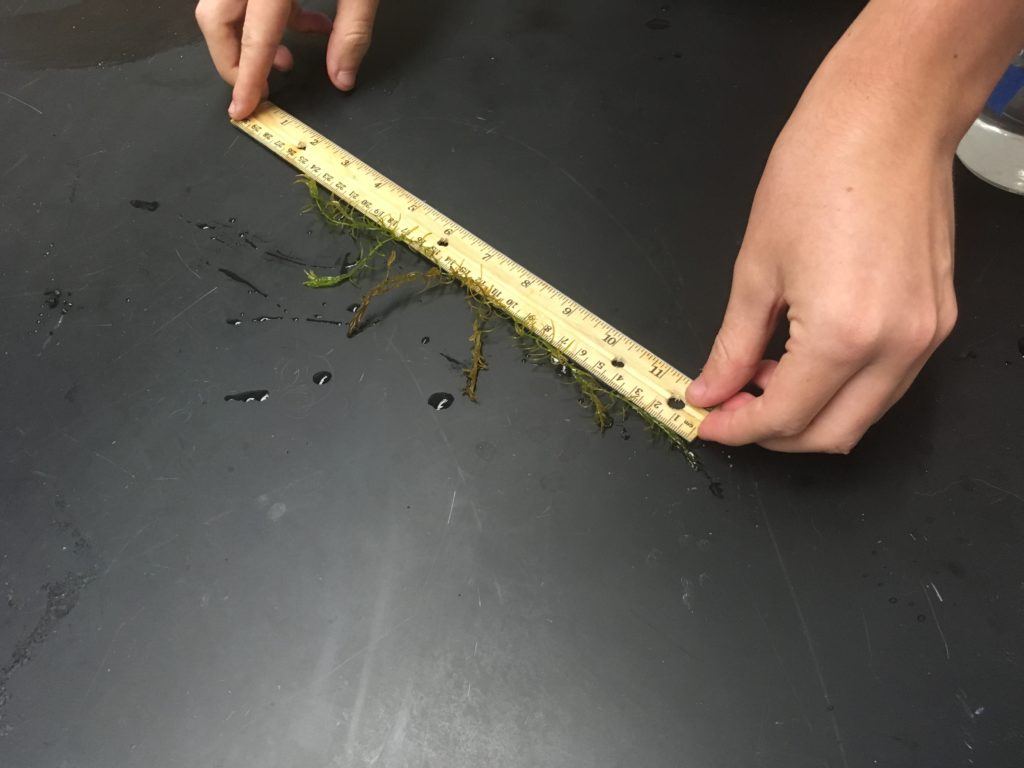
This is a fairly easy chamber to build. Also have students continue to take other data–plant height, soil measurements (optional).
I have a video on how to build the aquatic chamber or just keep scrolling down to the pictures and explanation.
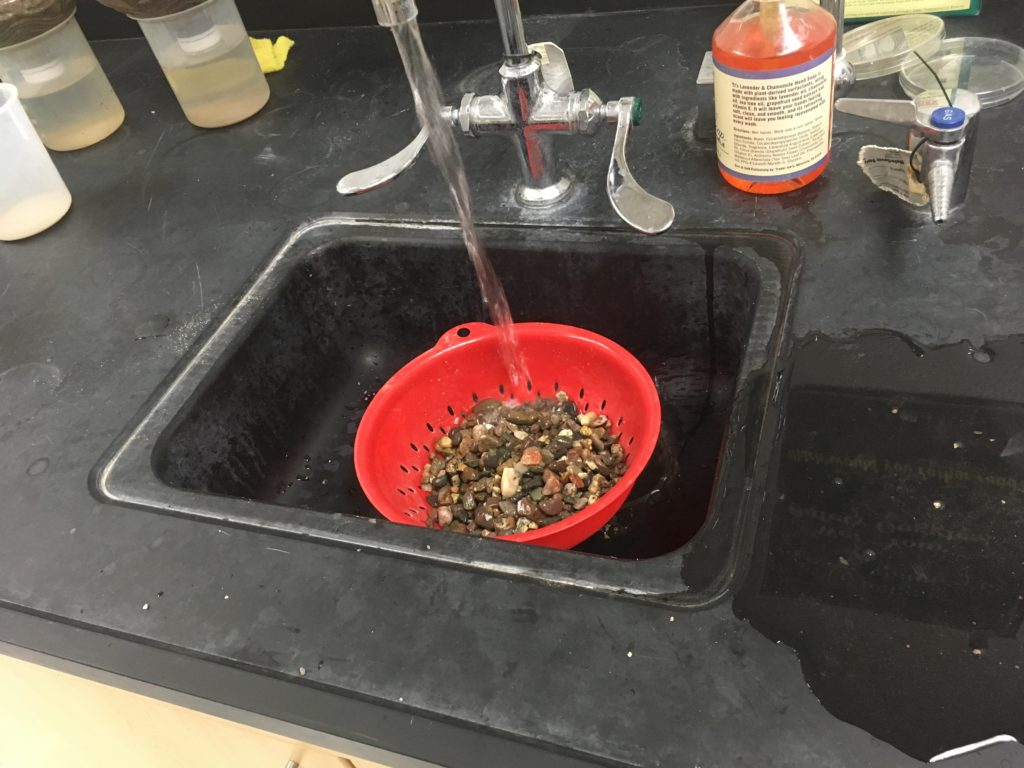
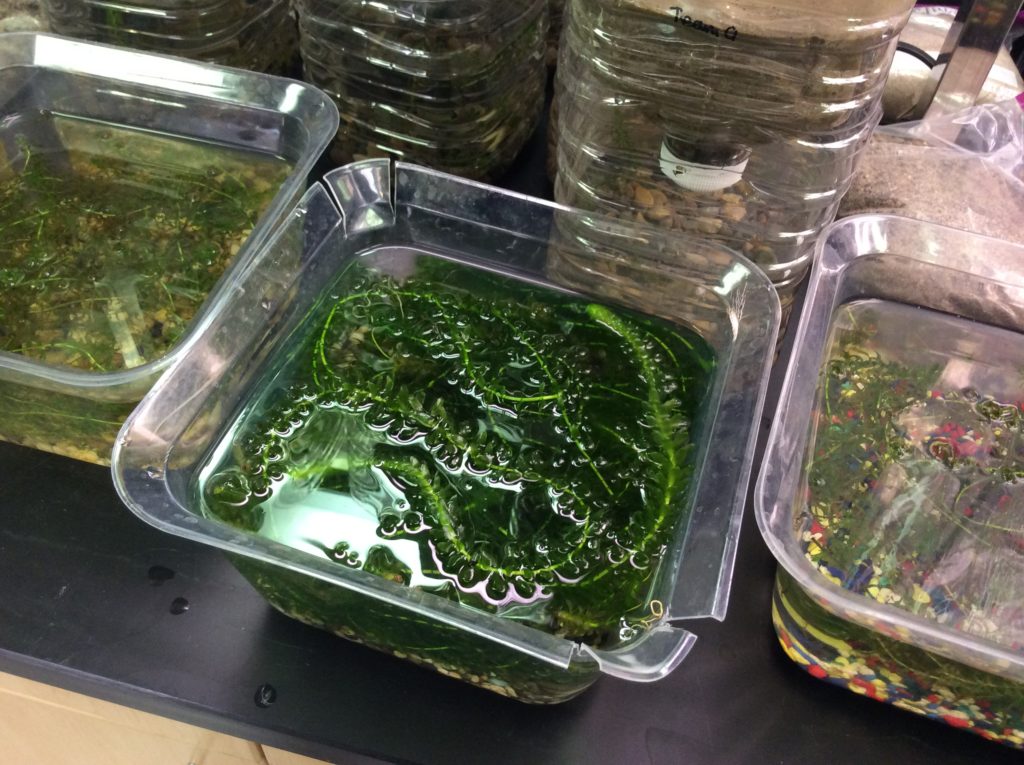
First they need to clean some gravel. You can use aquarium gravel, but its really expensive. We use construction gravel that costs $3.50 for 50 lbs. But, its filthy so kids have to clean it.

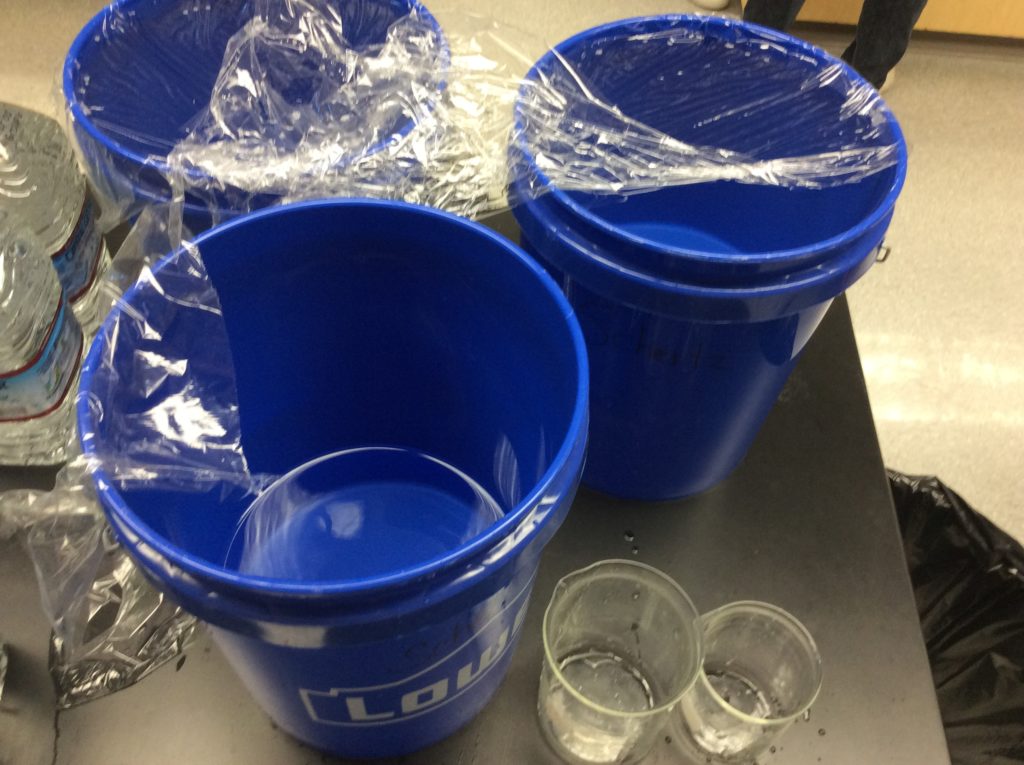
Next, students add purified water. I have kids “donate” the water from their original bottles in these buckets and keep for two weeks. Its not as good as distilled, but its better than me spending a week making liters and liters using our building’s distiller.
Students take water quality measurements (see below) and then add a sprig of elodea. They measure the length each time we do data. Elodea is the cheapest water plant at the pet store (called Anachris there). Its also available to order from scientific supply companies. Duckweed also works well, but I don’t often have a steady supply here in Southern California.
I usually buy elodea at the pet store (call ahead to see if they have “anachris” in stock) or order and have delivered. While I’ve never ordered elodea from Amazon, I see that they have it. 3 Bundles Anacharis “Egeria Densa” Elodea Live Aquarium Plants

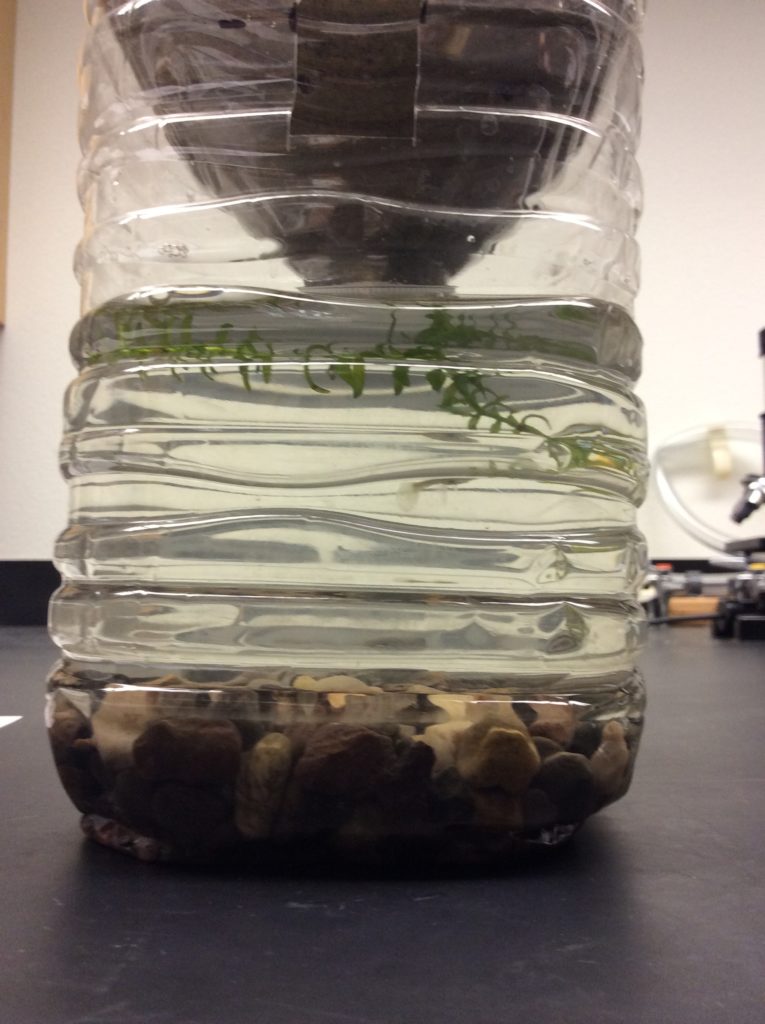
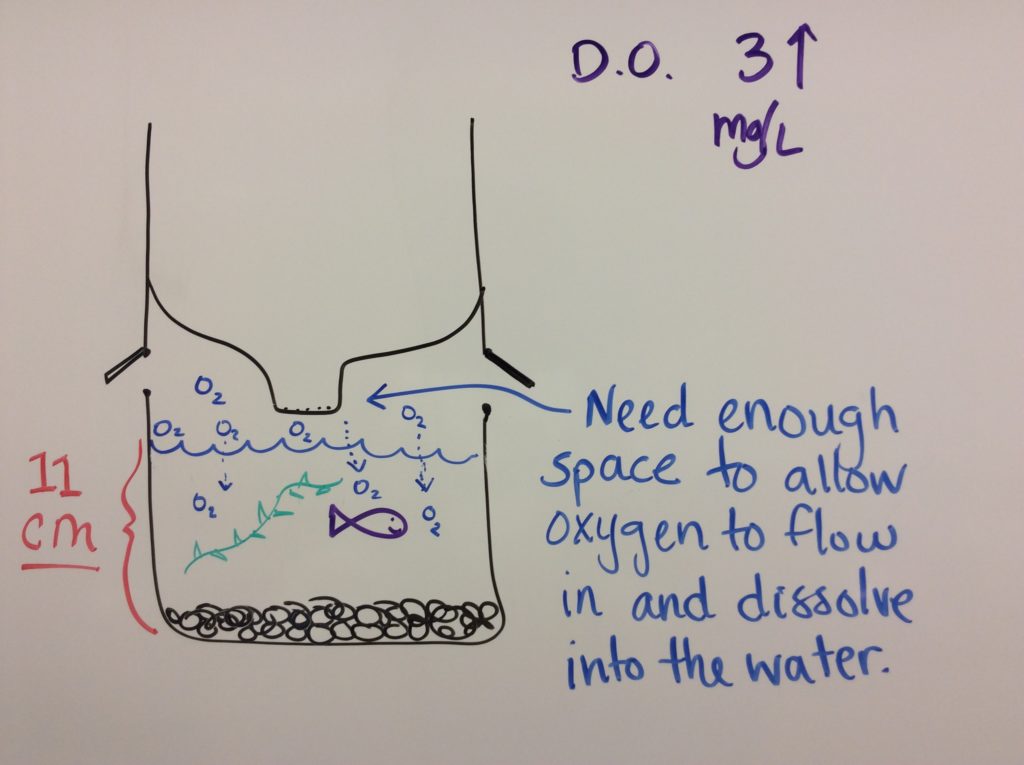
Make sure students leave enough space for air to flow through and that there are holes cut in two sides. This will allow for enough dissolved oxygen and prevent fish death.
NO FISH FOR TWO MORE DAYS! Dust from the gravel needs to settle or it can kill the fish by clogging their gills and nitrifying bacteria need to colonize the water.
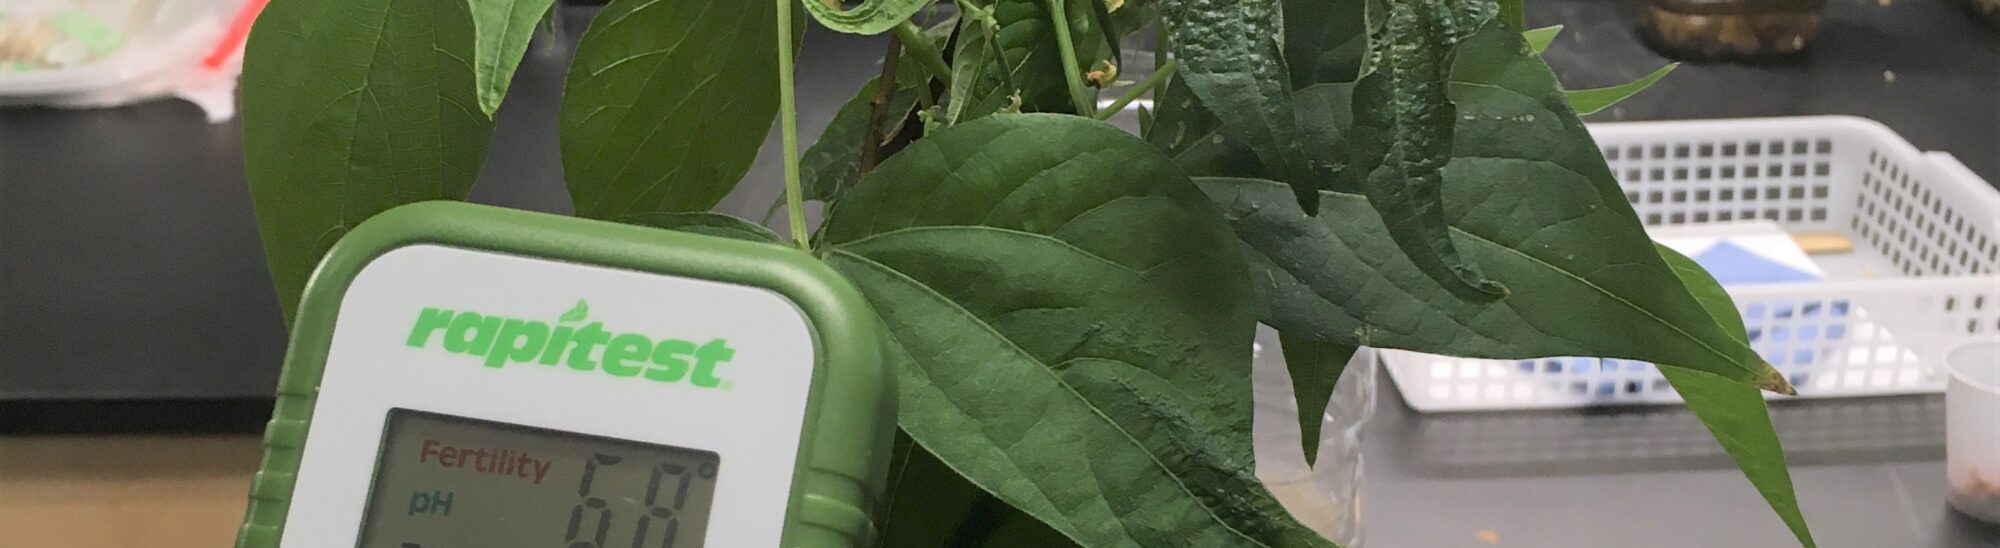
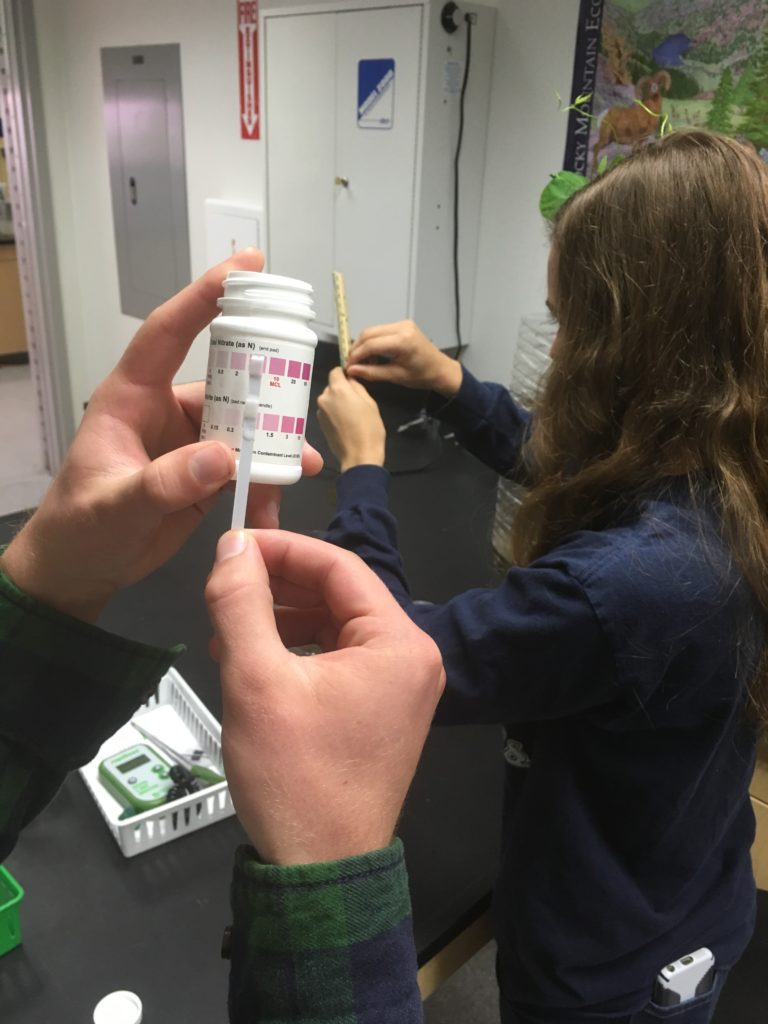
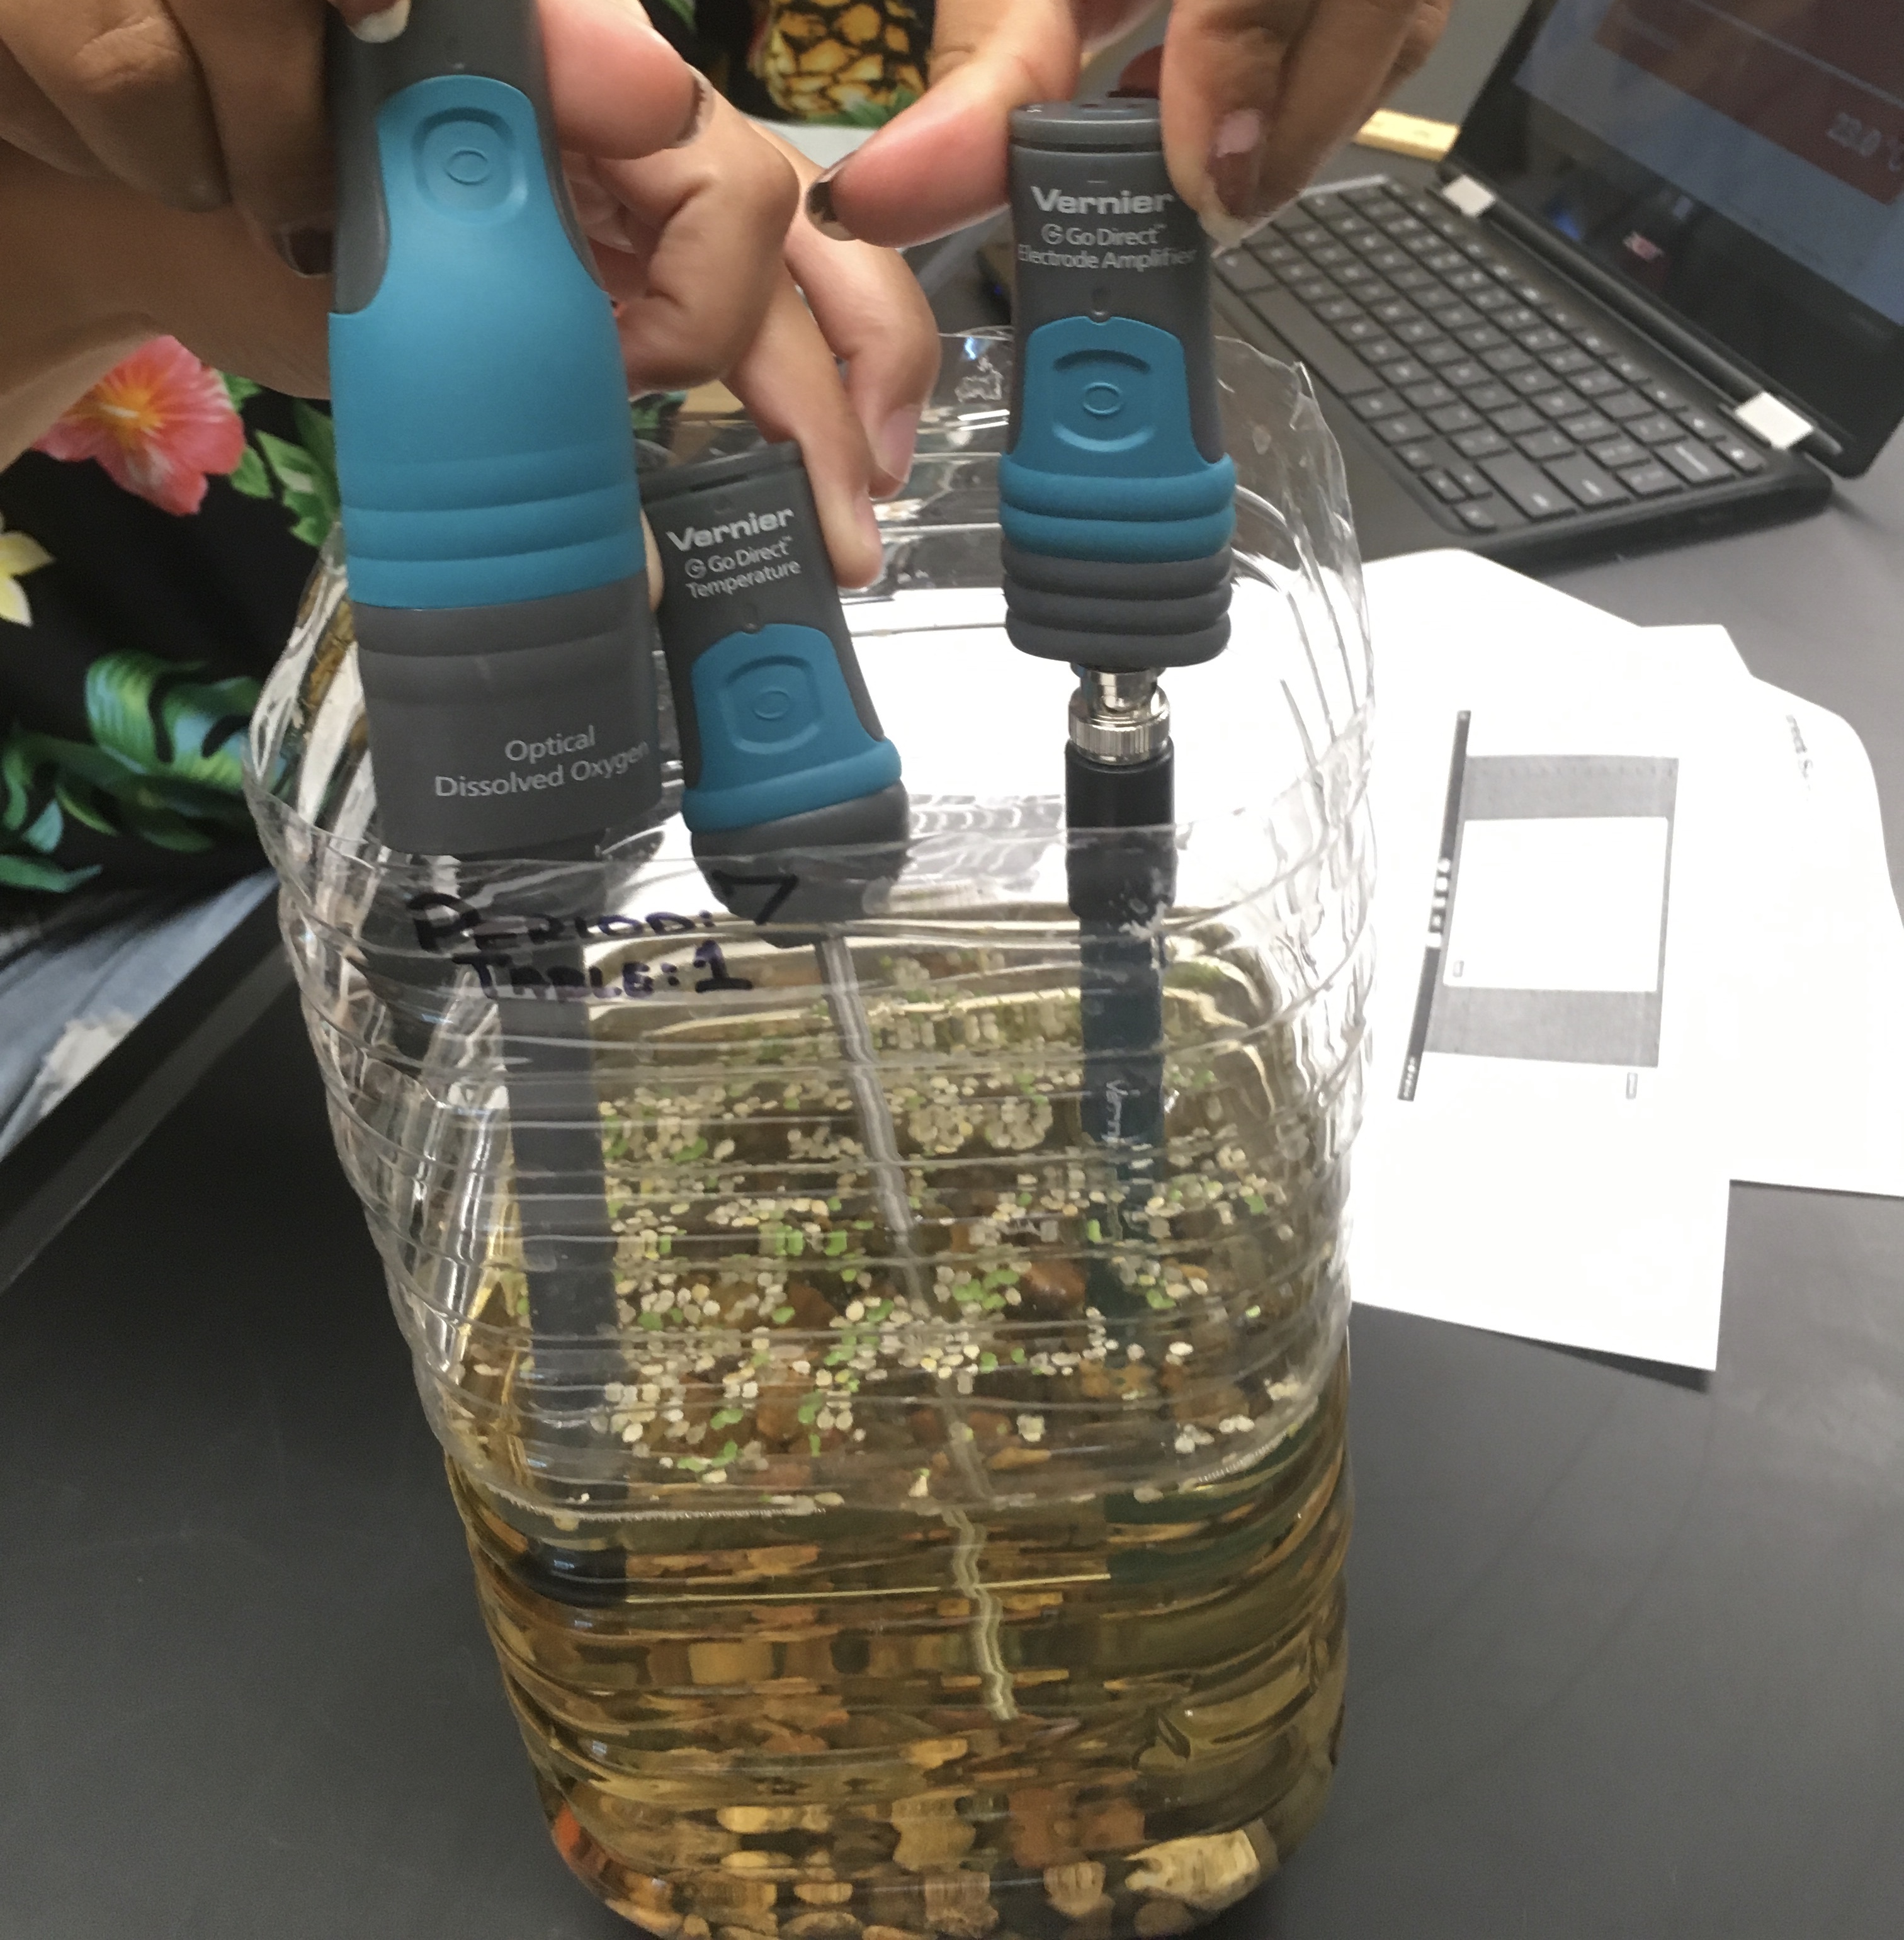
Taking Water Quality Measurements
First, use what you have. I’ve built up my collection of probes over 10 years using various grants. You won’t have this much to start and neither did I. Probe readings take only one minute so students can pass around and share.
Last year, I made laminated instruction sheets for each probe and then kicked myself for not thinking of the idea years ago.
You can also use water quality testing kits, regular thermometers, pH paper, etc. Splurge on a dissolved oxygen probe if you can beg some money.
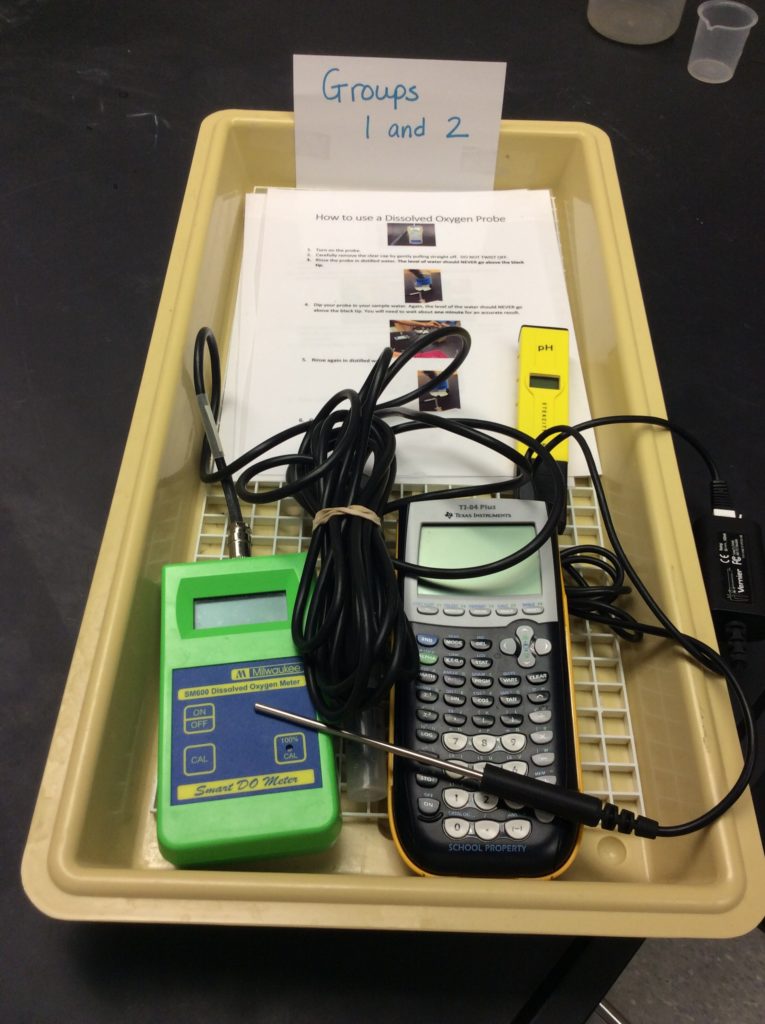
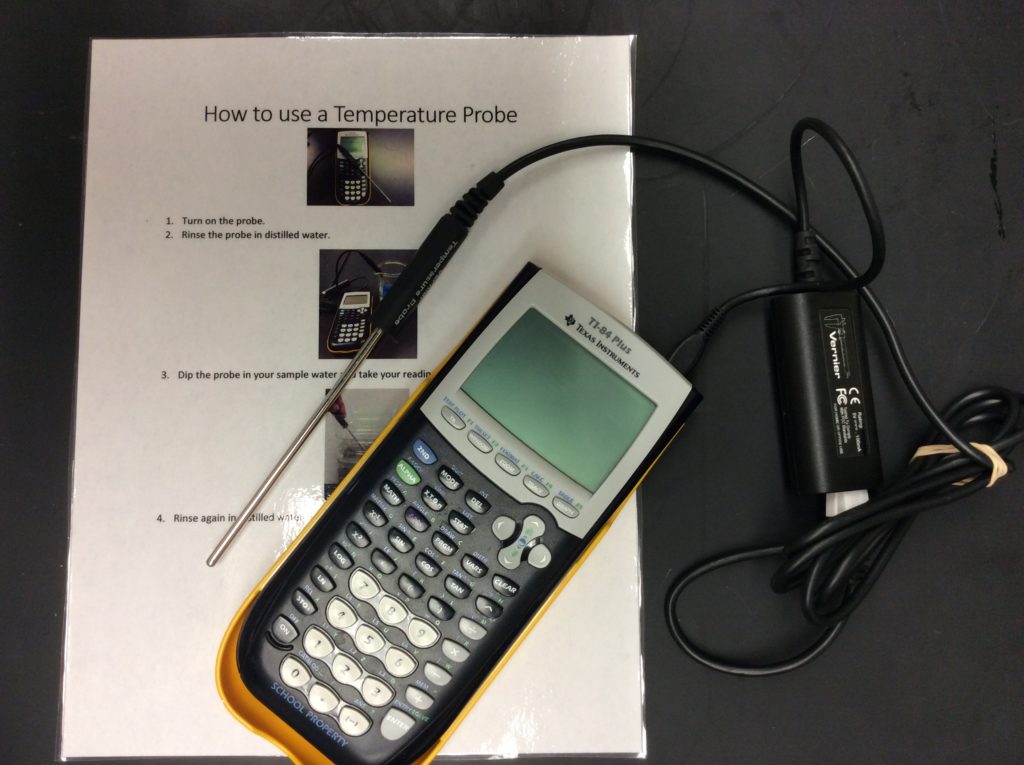
I use vernier temperature probes, because I have them, but this is the expensive option. You could use a regular thermometer or temperature probe just as well and they’re cheaper.
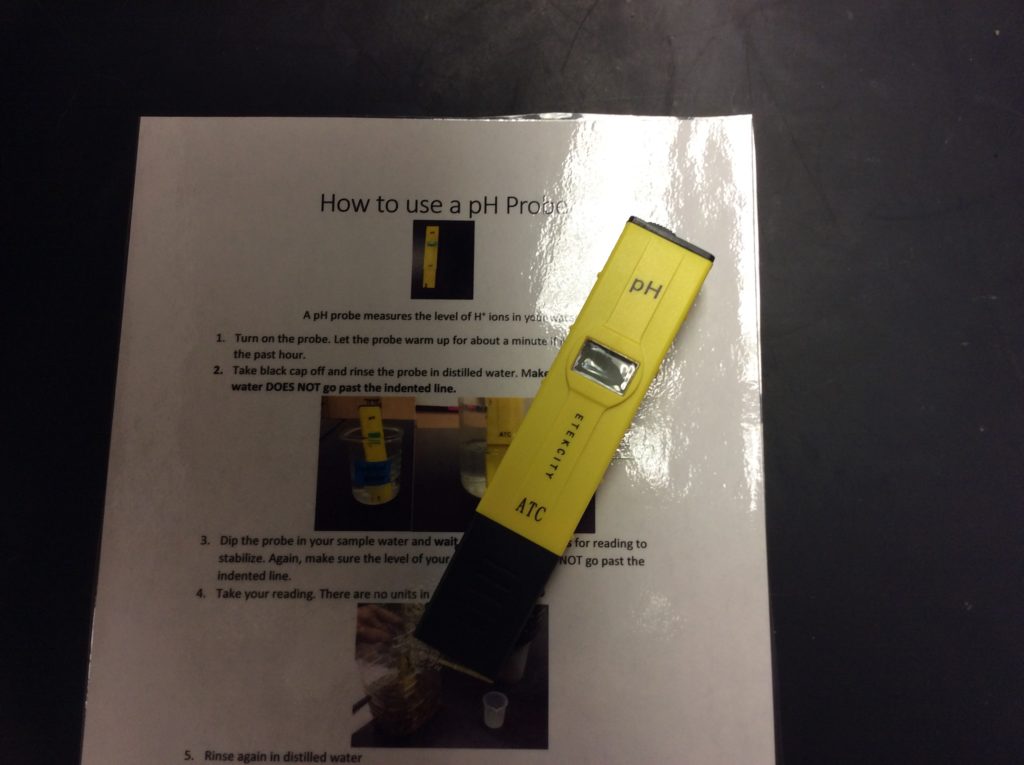
You can use pH strips or pH probes. I no longer recommend the yellow probe in the picture below. They have not lasted. Instead, I recommend inexpensive pH probes from Hanna as its a trusted company that focuses on pH–and its really easy to calibrate. Click for their inexpensive model.

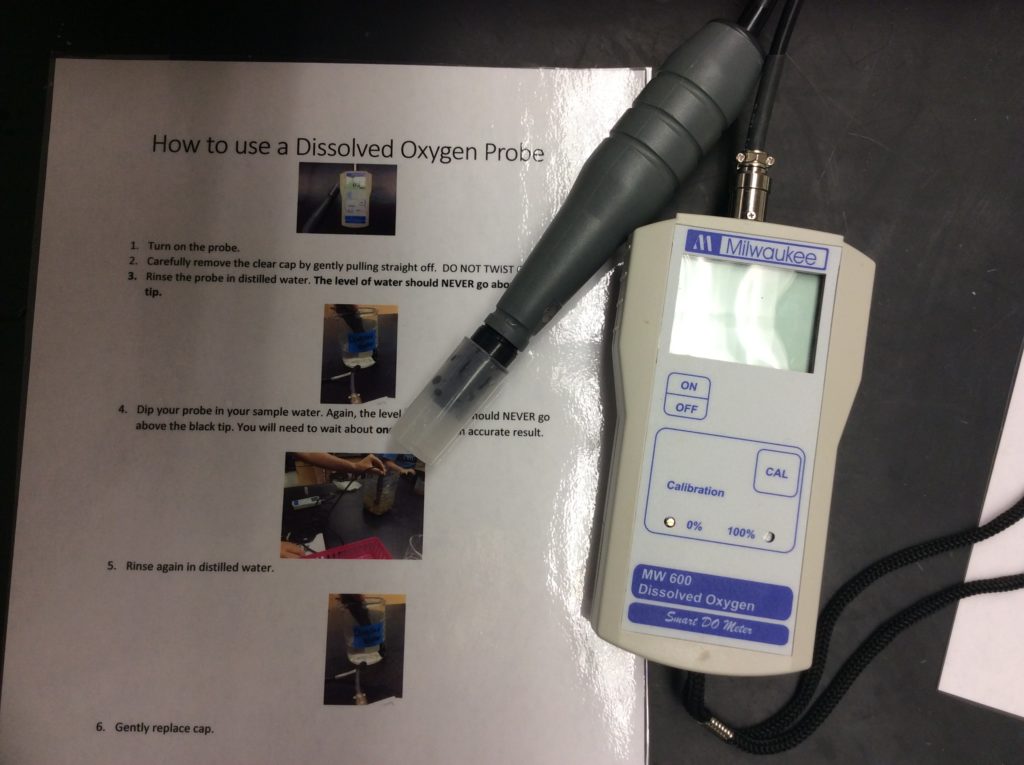
I like the Milwaukee MW600 LED Economy Portable Dissolved Oxygen Meter, because they last a long time and rarely need calibration. Plus, they’re inexpensive on Amazon (under $200). I’ve heard good things about the optical dissolved oxygen probes from Vernier or Pasco too.
We take group nitrate and nitrite data since the water is all from the same source. This saves money. After this day, the students will take their own readings using strips. I use strips instead of probes, because nitrate probes are notoriously difficult and lose calibration easily–sometimes in the middle of a period and take 30 min to calibrate. Forget it! I learned a new trick last year–slice the strips in half vertically and they last twice as long! A HUGE money saver!
These strips have served me well for years Industrial Test Systems 480009 WaterWorks Nitrate/Nitrite Nitrogen
Below is a video on how to use each of the probes and strips.
After two more days, your students will LOVE your class, because they get a fish!

One thought on “Building the Aquatic Chamber in Ecocolumns”